


Juju's Petals Quilt Finished
5 weeks ago

 I loved using the clamshells and circles - just brought out the Asian feeling more.
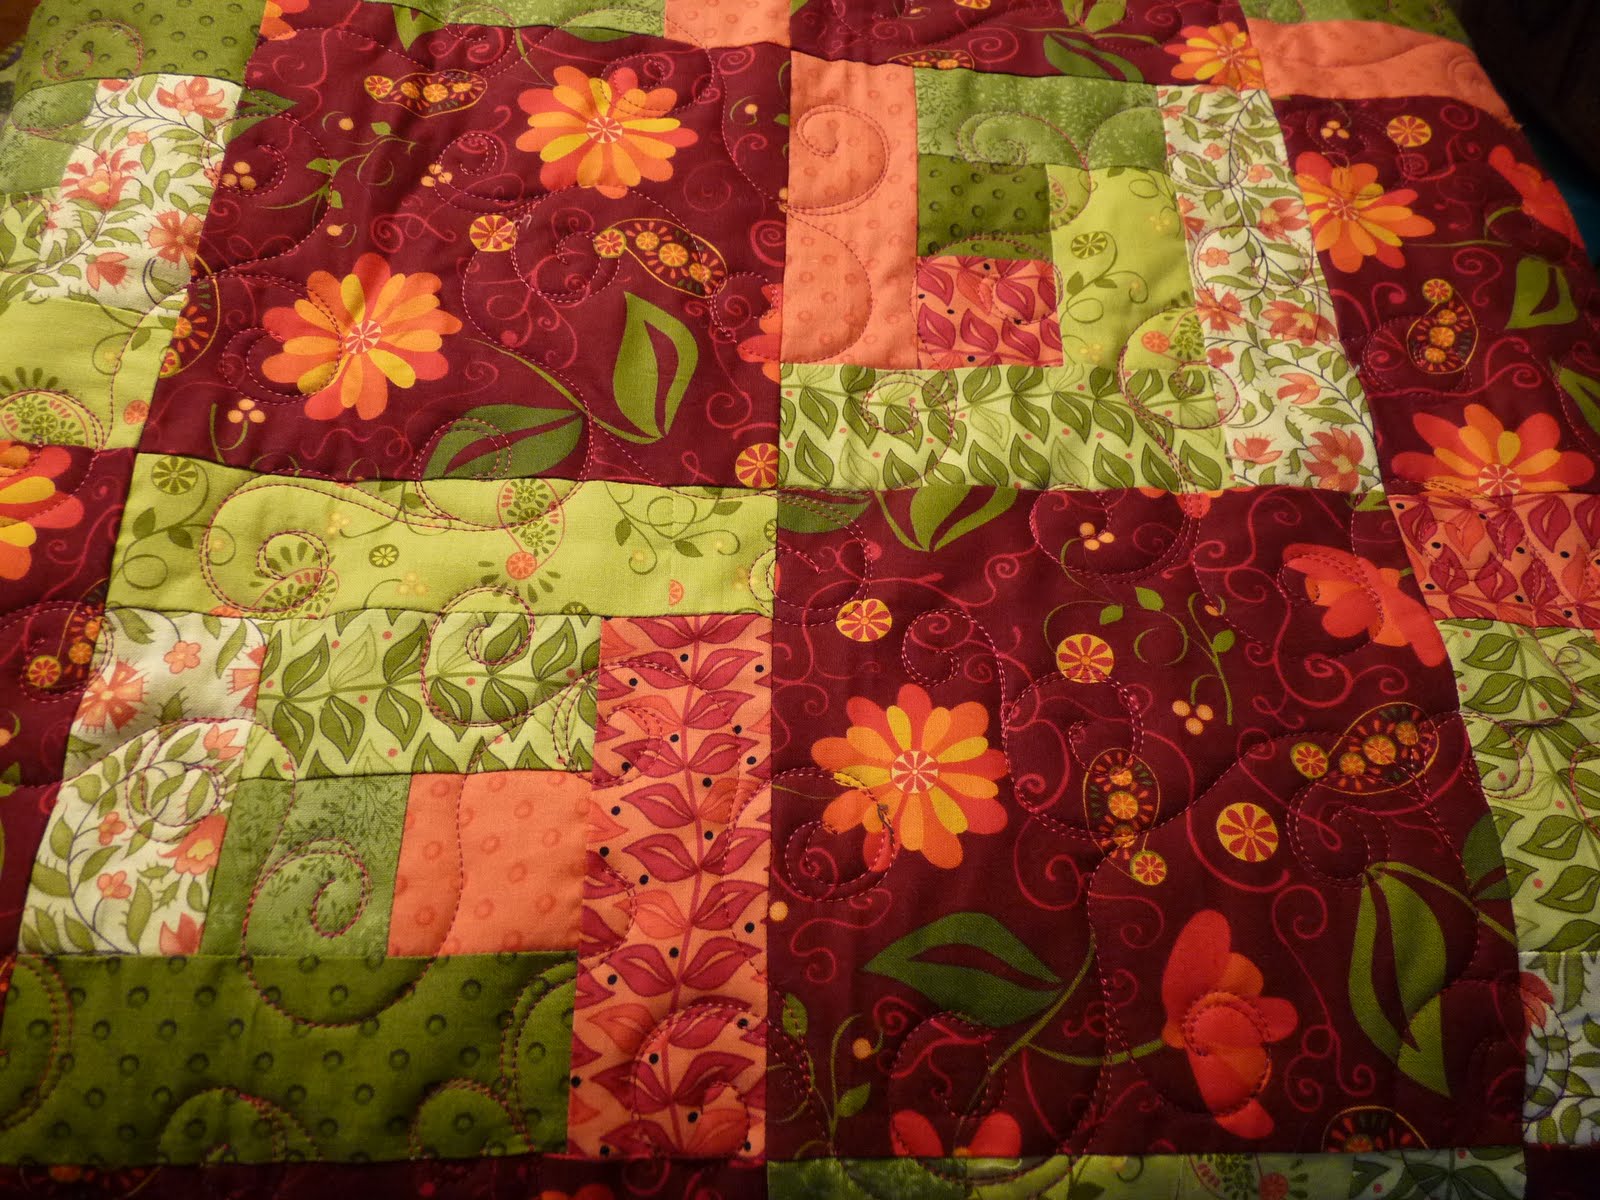
 This quilt looks much different from the first one I did. The colors and quilting style are softer, subtler. Both pretty, just so different.
  I like sampler quilts. They are fun to piece. Interesting to quilt. But always time-consuming because I have to think deeply about each block, and what features I wish to bring out.
 And one glimpse of the back, which is really a dusty grayish color.
  -----------------------------------------------------------------------------
 It is neatly pieced from Free Spirit fabrics of the Annabella and Treetop Fancy lines (you can tell that I loved this stuff 2 years ago!) It is hip with polka dots, sure to please any young to teenage girl. I may have backing fabric that I got at the same time which will coordinate, if interested.
  The top is for sale for $55 plus shipping. Paypal please.
 And there is more...If you are interested, I have many of these fabrics that I could also sell off to you at between $4-5 per yard. This would facilitate finishing the quilt if interested. Note: I have a large backing piece assembled too that coordinates. If you want the quilt larger, more could be added to the backing.
 This is fairly large - around 75x90. We'd initially discussed quilting meandering stars because that seemed fairly patriotic, but once I got the quilt I felt differently. The elements of the stripes relate to verses of the song America the Beautiful...amber waves of grain, fruited plains, sea to shining sea, etc. There's a row with these waving flags and another with soaring eagles and rushing ocean waves. It seemed more appropriate to quilt it with simple moving lines to represent the wind or the waves or fields of wheat blowing. In the end, I am happy with this decision and I think the client will be too.
  I did not do the waving lines through the center flag. This is the quilt's focal and it needs to be undisturbed. I waved through the red stripes of the flag and placed stars on the blue, and simply outlined the Statue of Liberty, which is an awesome fabric for this quilt. Where on earth did she find this??!
 So I know my pictures are not great, but here's a look at the many printed fabrics she chose to represent these lyrics. I love those purple mountain majesties and fruited grains. How fun is that.
 And there's uncle Sam hats, and some patriotic angels and I'm not sure about the people (2nd row from the outer below), but they just remind me of "We the People" from the constitution!

 The reed blocks were from the client's Block Lotto winnings. Gotta love that bright green.
 2. 4 yards of 108" fabric from http://www.sewbatik.com/. It is this fabric, same colors.
 Shipping (delivery confirmation and insurance extra) is $10.95 for each, or $14.95 for both.
  Here's another sneek peek at the week's quilting. This is one corner of a wall-hanging. The appliques are ditch-quilted, but I have not yet added any definition to the leaves or flowers. I'm not convinced I am adding anything to the leaves (like veins), but the flowers will get some stitching to show petals.
 Similarly, there are dimensional flowers that will be added to the ends of the embroidered stems. This is the center of the quilt. I think I like the design and all, but I have decided that white or light quilts are not my favorite. They show everything - good, bad or otherwise.
 I have 2 more corners of vines & flowers to SID, and then onto the cathedral windows to do what??? yea, something. Either way, it's off by Sunday so I can be onto other things....like removing the purple bleeding!
 Thread...
 Piecing & Squaring...
 Sorry this is upside down! I did have fun choosing and combining florally and geometric designs. I love it when they are used together to help the eye to jump around. Too many feathers is just busy. You cannot see the beauty of each element if they all run together. So I reserved feathers only for the outer white-ish border and the feathered heart blocks.
 The fabric of the setting triangles is busy and I thought it might be hard to see what I was doing so I just did the cross hatching.
 I love how the two narrow borders came out. I didn't want to break it up too much and use 2 separate patterns, so I designed it to work for both dissimilarly sized borders.
 I used a Hobbs 80/20 batting and Superior SoFine threas (ivory and sage green). I designed the pattern for the pieced blocks so it could be stitched continuously. I might have done quilting in the creamy colored triangles, but it's a lap quilt and I just decided it had enough stitching.
 I have my quilt on the frame now (one with the grapes). With nearly 5 hours of stitching behind me, I can say that I have made a dent in it. It is rather small, only 42" square, so I don't think it is a quilt I will stitch on indefinitely. I hope to get it to a good point where it can come off the frame later this week, and move on to paying clients :-) It's fun to quilt for myself, but it does not pay the bills.
 You guessed it - sea glass.
  I have made only about 25 of these - only another hundred or so to go! I bring the supplies when I go to Sophie's weekly appointments. So far, I like how this is going. I am going to try my hand at invisible machine applique.
 2. A cording foot. There are different types of these, but this is what I have and it works well.
 Cut the fabric that will cover the micro-cording 1.5" wide, and as long as the piping was cut to. Be sure to piece the sections together with a 45 degree bias cut, or else you will have too much bulk. Then press this in half. The micro-piping will slip neatly into the crease.
 Put a matching thread on top and bottom OR a water soluable thread (only if you plan to wash your quilt). Using your cording foot, stitch to the edge of the cording. I usually also secure the top end of the cording before I stitch so it cannot pull out.
 After you are done, you will very carefully need to trim the cording by placing your cutting ruler's 0.25" line on top of the seam, and rotary cutting off the excess. This takes a few minutes, but is necessary.
  Here's what you'll have a few minutes later. Unfortunately, you cannot start with piping the correct width because this is just too narrow to manupilate with the sewing machine and the cording foot. Susan Cleveland has a nifty piping cutting ruler that actually has a slot for the piping to ride into. But I am cheap, and opted to save my $$ for some other gadget. Everyone is trying to sell us something.
 Now, go to your regular sewing foot. Stitch the piping to the quilt's edge (Presumably you have already blocked your quilt at this point). The seam allowance may be set to 1/4" or you can just sew directly on top of the existing seam on the piping. Notice what I do at the corners. As I finish one seam, I back stitch a couple stitches. I then gently pull on the cording. I want to pull out about 1/4" of the cording to relieve the amount of bulk in the binding's corner. Do this on both ends. The next side of piping is started right at the end of the quilt (ie, do not do a folded corner as you'd do with your binding - the cording is stitched in 4 separate pieces). It is a little easier to remove the excess cording before you stitch the piping down.
 Next you need to cut your binding however you like. My binding is prepared on bias but either way will work fine. Again, make sure your binding strips are pieced together with 45 degree bias seams to reduce bulk. Listen carefully here. I cut my binding my usual 2-1/4" wide, pressed it in half, etc. Hindsight is 20-20. When I do this piped binding again, I will likely use 2-3/8" instead. Bear in mind that my quilt was quilted with 2 layers of batting, and is thicker than some. But mostly, with the piping, there is more bulk for the binding to have to go around. I did make my binding work with it 2-1/4", but it is a snug binding, and was not always pleasing to stitch it while it wanted to pop open.
  But the finished product will forever change how you do bindings. I promise. The above picture is before the binding is actually stitched to the back side. At this point, check and see how easily your binding is going to wrap the quilt's edge and comer the lines of stitching. If it looks close or that the binding will be very tight, then trim 1/16" or so off of the edge of the quilt, uniformly all the way around all 4 sides. Your binding should be "filled" but not so tight it takes jumbo clamps to hold it down in order to stitch.
 Here's my finished binding. I totally love the effect of the piping. For show quilts, this is a very classy edge, and it most definitely will help it to hang more straightly. For any quilt, it is just a lovely way to infuse one more design detail into the finished quilt.


