Monday, February 28, 2011

Quilt Blocking

I have found a few decent websites or blogs that discuss how to block a quilt. Most of them are better if your quilt is on the smallish side. Quilts that are heavily quilted, as my floor quilt is, require blocking to return them to their appropriate and original shape (or else they will hang wonky and wavey, and be rather unsightly!). If it is only going onto your bed, then it's not such an issue. But this quilt is heading to MQX in 3 weeks (yea!...just got the email this weekend that it was juried into the show) so I don't really want to give judges and viewers a pimple to see right off the bat.

Here's what I did...
The supplies are simple. There is a little cost involved, but these items are reuseable or you may already have them. I got 4 sheets of 24"x8' (1" thick) styrofoam (interlocking style) from Lowe's. All 4 sheets were about $40. You can use them as a design wall when you are not blocking quilts. Other things I used include a tape measure, metal square, permanent pen and a box of 300 stiff pins. Other websites say to use T-pins, but I thought they were kind of pricey so I got the dressmaker pins - they have a wider shank and don't bend like regular piecing or applique pins. They were under $5.
My quilt is (give or take) 75" square so you also need a large space that can be left undisturbed for several days. I could have cleared a place in the basement, but my bedroom is cleaner and warmer, and because it is 12'x18', it has the requisite 8'x8' space needed. I had to move the bohemoth bed a few feet, but we can survive this week (it's good training for a month from now when we begin our downstairs home remodel - It wll clearly be much messier then). Guess I just have to crawl over my husband to get out of bed :-)
All 4 foam pieces connect to make a large solid surface that the quilt will be dried on.
I taped the pieces together with duct tape just so they couldn't shift any while I blocked the quilt.
I also marked a square corner, and marked lines out from this corner for ~75". This is the corner I started pinning at.
But before there can be pinning, the monster quilt had to take a short bath. No jets or bubble bath, but a 5-10 minute soak to ensure that all fibers were wet. Trust me, handling it (all 18 lb of it) was worse than lifting a wet dog from a tub. I got soaked before I ever started to block it. I didn't dare wring it for fear of messing it up. I blotted as much moisture as I could with 3 towels and then took it to the blocking pad.
I started pinning the quilt to the corner I marked with the square, placing pins every inch or so. The pins are stabbed in at a backwards 45deg angle so they will hopefully not pull out. If I had made some measurements before I soaked the quilt, then I'd know what the "average" length and width of the quilt were, and I'd then stretch the opposing sides of the quilt to be this distance. We'll pretend I did this. In actuality, I stretched them to be the same distance, but my quilt is out of square by about half an inch so length and width are not the same. Oh well. I also could visually shift the placement of the edges so that all of the stripes and borders appear most straight. The whole process took about ah hour and a half. Lots of wet knees. OK, just 2, but they are quite damp still.
Now I have a fan running in the bedroom, and I have jacked the heat up from the normal daytime setting of 60F to 68F, in hopes of drying this beast before next week. I may also go back later and walk gently on top of it with some towels on the quilt's top to get out unnecessary water. I am pleased with how straight the borders look, as they were looking pretty wonky towards the last times it was on the frame.
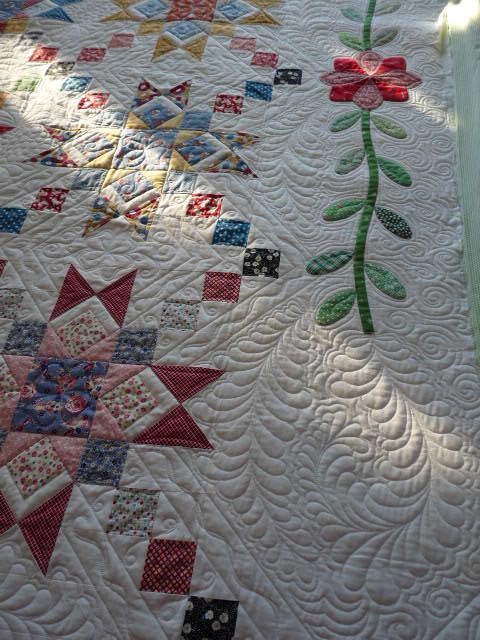
It may well not win anything at MQX. In fact, I highly doubt that it will. But it is an important step in my quiltmaking journey. It was good enough to get juried into the show. Now I am trying to do the last things I can to make it show as well as it can.
Tune in next week as I (hopefully) document the successful application of a piped binding.


Wednesday, February 23, 2011

Recent Thimbleberries Sampler

Back to the real world for me. I have been away from my quilting for 6 days and now I must get some customer work quilted off. This past weekend, I took my kids to visit my SIL and their cousins in CT. I was able to deliver this to my aunt. It was the last of the 5 quilts she gave me in August to have quilted. Though Thimbleberries are definitely not something I like, I think that the finished quilt is nice. Here's the full shot - I think it is a smallish queen or a good sized double bed quilt. It's some sample blocks and too many (in my opinion!) borders.

Before I do any closer-ups, here are a few shots of the back, where the stitching shows up more. The back is a green print. I combined 2 of the borders to simplify the number of quilting designs.

One of my goals of this quilt was to do a custom quilt, but without the excessive use of ruler work. The wiggly crosshatching is one of my favorites (kind of looks like a mattress quilting!) - I will definitely do that again. I chalked out regular cross hatching, then just stitched it wiggly without any rulers. Nice and quick, unless you count the side I had to take out because I missed the proper chalk line! Doh!
I did some real feathers, some looser ferny feathers, and other simple (and at times organic) quilting to tie these together.

OK, now to the front. Each of the sampler blocks is quilted like this in a soft sage thread. It kind of goes against my normal convention of stitching in the color of the sashing or background fabric (white), but I really wanted to minimize thread changes. As it was, I goofed and neglected to take out a bobbin when I changed a top thread and had to pick this out. Drat.
There's way too much SID needed on this quilt, with all of its small borders and sashings. I thought I was going to go nuts.
I'm not in love with doing swags, but on this heavy print, and wide outer border, I really didn't know whatelse to do. Piano keys would have worked, but that was wider than my ruler!

The setting triangles turned out really nicely feathered. The thread matches perfectly, but the quilting shows in the light.
This week is a bit of a bust for accomplishing much. I have company tomorrow evening. My kids are out of school this week too. My floor quilt is on the frame for a max of 2 days for finishing quilting, then off for good. I will get the foam board to do a proper blocking. I made piping and binding last week, and then it is finito. I fully expect this weekend ot make decent progress on a gorgeous customer quilt - one that the client wants decoratively feathered.

Wednesday, February 16, 2011

Carpenter Stars

I need another project like I need a hole in my head. I have yet to put together my beachy blocks into a background. I still need to piece the parts together for a commission quilt that the client is finally getting around to paying for. And, I need to make binding & piping for my floor quilt. What can I say?...I work better under pressure. And if that is not enough, I just got a call from the school nurse informing me that my 8 yr old chipped a permanent tooth in gym. And we are departing for CT in 2 days. Great. Dumb tooth. Dumb kid. Dumb frisbee. Need I belch out more for you to grasp my frustration. Last thing I want is for my kid to look like a redneck any longer than he has to. Even if he thinks that it would be amusing (and I am sure he would).

So I have opted not to put another quilt on the frame this week since I am leaving Friday at lunch time. So I spent more time today putzing with these strip sets and resulting diamond blocks. I sense that they will drive me berserk when I get around to doing all the y-seams to put them together, but what the heck. I rarely take the easy road.
The only groundrule I have imposed on myself on this project is that I will not buy fabric for anything but the backing. So, all of these have come from my stashes of goodness. The colors coordinate wonderfuly with my decor, so I suspect that this will hang in my new dining room next summer.
Now, the offending kid just got home. Gotta go inspect the tooth.

Sunday, February 13, 2011

More talk on the Tools of My Trade

Earlier in the week I showed a bunch of the templates I use quilting, and talked about my favorites and why. Today I am showing you another tool I use - The Bamboo digital pen tablet. I got this over a year ago, and while I don't use it to design the quilting for every quilt, I do use it for the most custom of designs.
I take a JPG photo and open it in Photoshop. Then I can define layers which can be turned off and on depending what designs I draw that I want to show. It does take a little getting used to drawing on a tablet, but looking at the screen to see what is drawn. The hand-eye coordination is a skill to develop. Admittedly, there are advantages to just scribbling out a design on paper, since I can take paper anywhere I go. But since I do a large amount of my business with clients nationwide, I like to be able to have a design that I can email to them. If I find I dislike something I have drawn, it is easy enough to just erase and redraw, or just delete the layer.
I have recently finished all of the applique and embroidery on this quilt. I know it's going to be a ditch-stitcher's nightmare, but that is a different story. I hope to have it quilted for the Maine show in late July. So, time to get on the design. I've been pondering this design a while now so when I started sketching on the photo yesterday, it really came together quickly. I had to do a few checks to see if my templates can do the particular curves I have sketched, but mostly it was easy. I'd sketch out an area, and then copy and paste it to the other similar spaces on the top. Here's the corner concept...
I have a ton of SID to do, but I envision a few ghost flowers, a feathered border to define the space, and some unknown filler.
The center will eventually have small 3D flowers added at the end of the vines. And the blank spaces will be filled somehow too. I like the rays since they bring the eye outward and inward towards the center.
The cathedral windows portion of the quilt will be ghost-extended into the tan background. I am undecided still about what color thread I will use, but I am leaning towards a soft lavender. I want it to show subtly on both the tan background and the purple pieced cathedral window. I am also planning to try my hand at stitching a curved & woven area. The background of this will be filled in to give relief to the cross-weaves. ...something ambitious to make me think hard (and pull out my ever-increasing gray hairs!).

Friday, February 11, 2011

1930's quilt

I have yet a 3rd client stemming from my doing the Folsom Quilt & Fiber Guild's opportunity quilt. It's all so circuitous how these started, I can hardly believe that I have clients sending me quilts from northern California (pan back to my fall posts to learn more). Even stranger yet that I lived there and was actually part of the community in that area for 3 years, but didn't know any of them then. Some aspects of life really do come full circle. Anyhow, this quilt is being given to the guild's president in a month. I suspect that it's safe to post this here, that she won't fine my whereabouts (or her gift's whereabouts!). The client sent me this quilt, all from 1930's reproduction prints. Actually at least one of the blocks is from real 1930 prints too. I have learned from MQ Resource that this pattern is a 2008-2009 Fons & Porter pattern, and appeared on it's cover.
Its pretty large - around 78"x95" or so. There are still some yo-yo's to be attached to the vine ends and the flower centers on the applique borders. All in all, I think that the quilting compliments the quilt. It's light, feminine and free. I love when the quilting extends beyonds the lines of the piecing. It's more unexpected that way, rather than to just have the quilting follow the lines of the blocks & sashings.
I scalloped feathers around the border of the quilt, and put them coming off of the applique vines. Once the yo-yo's are added, it won't look like the feather starts so abruptly.
Despite there really being a lot of ditch (aka ruler) quilting, I did do much of the quilt freehanded. I want to get back to doing this more, and relying on the rulers so much. Rulers may be very exact, but using them is time consuming.
I added the ribbons within the straight lines mostly as an afterthought, because the space seemed underquilted. In hindsight, however, they seem so appropriate. I love how they soften the straight linework.
Here'sm y favorite block - who doesn't just love soft lavender??
The center of the quilt is quilted slightly different from the edges, just to set it off a little bit. I did the white filler areas with more feathering and pebbling. I could have done it identical to the periphery, with the small flowers & swirls, but this seemed to make a good focal point. Dontcha think?
The back is a light green gingham. It was terrifically forgiving, not really showing anything but the texture. I like it when backings look that way, rather than being a mass of a zillion threads.
The only regret with this quilt I have has to do with the white fabric. As you all have read dozens of times here, I hate thin white fabrics! I picked out more and more dark migrant threads that were not trimmed well or came from the darker prints. If you have to spend more money anywhere, let it be on a good weight white!!!
Cheers, and have a very nice (and if at all possible, warm!) weekend.

Wednesday, February 09, 2011

Background

The 48 7-1/2" blocks that make up my next quilt are finally done. These are paper-pieced kaleidoscope blocks. I'm kind of sick of paper piecing. I am so frugal, thatthe small amount of waste from paper-piecing bugs me. Plus, it makes a mess in my studio. This background is constructed of about 20 neutrals and 10-12 blues and greens, all batiks...my favorite. Does it look like anything familiar? Maybe a beach.
It will have some major applique added to it to transform it to another level. You'll just have to stay tuned to see what it will become!
Valentine girl always wants to be in the pictures :-)


Monday, February 07, 2011

The Tools of My Trade

Rather than post another boring post about my quilt that is in the works, and giving me fits of many varieties, I thought I'd show some of the things that make my quilting possible. There are plenty of gals out there that collect expensive shoes and handbags, but I have a more utilitarian collection. I have an unusually large collection of these (ie., see below!!) for someone that has only been longarm quilting a year and a half! Yes, templates. They're not the thinner variety that we rotary cut around when piecing. These are full 0.25" longarm templates. The cost of this box of pure acryllic goodness is well over $500, probably pushing closer to $100, but who is counting.
Let's start with one of my all-time favorites. It's just a plain old straight template, about 10" long. What is so nice about this one is that it's hefty and has that awesome handle. I bought this one from Bayside Quilting I think last fall right after getting my machine. I cringe everytime I nearly knock it off of my ironing board I love it so much! For straight lines and even ditch quilting, it is my ruler of choice. This is one good place to look for longarm supplies.
hahum... (throat clear)...that's not to say that I don't have at least 4 other possible rulers for the job of straight stitching too! Three of these were acquired at my Handi Quilter retreat in October, and the other (yellow one) I bought last spring. I have actually used the 2 HQ ones for ditch quilting some, but I have become so comfortable with my other ruler above, that using them sometimes takes more thought than it should. The yellow ruler (also called Janet-Lee's favorite) is by the Gadget Girls and I have used it quite a lot. It is good for doing parallel lines, which you know I did a nauseating number of on this quilt recently. But why, does it need to be something other than clear?? Guess they just had to be different. But seriously, I like many of the Gadget Girl's offerings.
In my very early days (before I new diddly about what templates I should buy), I bought this next one, also from Bayside Quilting. I tried stitching it a couple times but found it hard because the template is very long, nearly 14-15 inches. It rocked on the base. I do, however, use it often to mark sashings for doing swirly & waving quilting, like here. I know, you can mark quilts with much less expensive items - I think that this template was $25, but hey!
This little one is so cute! It's for teeny-tiny circles, as in flower centers. It didn't cost very much, and I don't use it often, but little circles are hard to make perfectly without it. Interested??...look here.
Now how boring would life be without a dozen or more ("more" would be the correct answer) circle templates??? The average gal could likely get along without so many, but I am not average :-)) Last fall, I started with a set of 5 circles ranging from 4" to 10". I learned later that they really stitch at 4.5", 5.5", etc. My first circles were the ones that look like the donuts. I like these because they are light weight, and because one template actually sews two different sizes of circle. These were from Bayside. When I went to Handi Quilter, they gave me yet another set of circles, ranging from 2" to 12", which actually stitch at that number. Glee!! No circles reproduced! The 10" and 12" circles are again, large to work with, and I don't use them comfortably. Before I started on the Italian floor quilt, I got a set of very small circles - 0.5" diameter to about 3" for that quilt. These came from http://www.quiltersrule.com. This company has an absolute ton of templates, but these in particular are not very smooth on the edges, and make my fingers very sore to use!
Over the last year, I bought (and was given) a number of template sets. There's the clamshells, which I used for the first time last week. Considering that this template is rather long, it stitched without any difficulties. I have 6" swags, hearts and teardrops. I use the teardrops when I am doing really formal feathered sections. Sometimes I stitch the hearts and them fill them in with a design. Again, the largest of both of these sets is larger than I tend to use.
With all of these templates, you must be wondering what I would not recommend. Am I right?? The ones below are mostly unused. I have a set of 4 or 5 squares (only one shown) that are definitely in that "What was I thinking?" box. If I weren't lazy about some things, I'd have sold these already. I also have the feather plume maker. Never used. An applique outline guide. Used only a couple times. We'll see if I use this on this quilt, or if I decide to go buy this. The template junkie in me just needs it! Just like that same junkie thought she needed that rope tool. I was going to use it on my Italian floor quilt, but then I tested it on a sample and discovered how much of a pain in the a#$ it was to use.
Just before Christmas, I bought two of the curves below (Ronda Beyer's) for doing curved cross-hatching and the cathedral windows on my Italian floor quilt. I have to say, I love both of these despite the larger of them being on the verge of too large for me to handle easily. My mom gave me the other arc and the LindaMae's Rays template for Christmas. You know my motto - can never have too many! I have drafted rays on another quilt the old fashioned way (using a protractor), but this is nice. I still used it just to mark my quilt, rather than to actually stitch the rays, but still, easier than the archaeic method.
So there you have it. That's the low and dirty on my template collection. When you start to have the urge to go shoe shopping, consider the other possibilities...Templates anyone?? Or maybe now it is time for something classier to store the templates???...like this? nah! Buying the storage devices is no where as much fun as buying the stuff to store :-)
So what are YOUR favorite items?

Sunday, February 06, 2011

Sunday Putterings

I started on my next quilt on Friday. It's proving to be more trouble than initially envisioned. I kind of thought it might be a little more continuous in it's quilting and less stop and start, but I seem to have been wrong. I am nearly two-thirds done with nearly 9 hours into it. Oh, to actually get some E2E panto jobs that I don't lost my shirt on! It is made from the 30's reproduction fabrics and a ton of relatively thin white. I swear, I think my tomb stone ought to read "NO Cheap Whites!". My message to all of you quilters out there is to spend the $$ to have a good weight white. It's so much more important than a good quality red paired with a cheap, thin white. I have given up picking out roght threads that have migrated to the white area. This quilt is pretty and nicely made, but there are still areas that seams of color are longer than the white seam, and the color shows underneath. Shucks. It has a great applique border which shows how much my outline quilting needs help! It makes me shudder to think how hard it's going to be to do this quilt (whenever I get machine time!). Visit back later this week and I'll probably have finished pictures of it, along with shots of my recent insanities, ie., I have 2 new quilts started - Having cut the fabric into strips does constitute "starting", right??

Friday, February 04, 2011

When is Enough, Enough?

(there is eventually quilt content to this post...)

I ask you, "When is Enough?". This is in response to winter. Snow. Cold. I am by all accounts a definite summer person. I don't mind the blazing sun, high 90's. And for many more months than I am afforded here in Maine. But winter, forget it. It is for the arctic birds. This winter has been the coldest and snowiest in recent memory. We've gotten more snow in January than in all of last year. And it has been really cold too. Like frigid. Many of you were hit with this week's 2000 mile wide snowstorm. Perhaps we were mildly spared, only getting 75% of what they predicted. But still, we've averaged 10-12" snow per week for the last 5 weeks. My kids have not gone a full week of school since before Christmas. They logged 4 snow days in just January! And if that's not enough, they are predicting another 6-8" tomorrow. At least it's on a weekend!
The snowbanks along my driveway are nearly to my chest, certainly above her shoulders! She can hardly keep her boots on playing in the yard.
And the sidewalks that the kids use to get to the bus stop are disappearing because the snowplows push the snow back onto them. The banks at the road's edge are at the height of my van's roof. I tell ya, this is no climate for a person to live in.
.
I did take a quilt off the frame today. It's from the Parisville fabrics, and has a massive amount of ivory Kona on it too. It's kind of minimalist, but hopefully the quilting brings out the more elegant simplicity of plain ivory. I'm not really sure why the stripes down the top are different widths or why the ivory on each side are not equal width, but these are not my questions to ask.
The borders are 21 and 25" wide, and are quilted mostly similarly. I brought the clamshell pattern from the following fabric, and used it in the quilting on the borders. I got to use my Handi clamshell template (I have 4 sizes!) for the first time since my October retreat to SLC.
The borders have nice texture and I think will look nice draped down the sides of a king bed. Yes, this quilt is freakin huge - about 106" wide and nearly as long! I did many rows of fancy feathers too.
There's about 2500yards of Bottomline thread in this quilt. Yes, that's close to a mile and a half for the mathematicians out there. The back of the quilt was (I think) constructed from a sheet. I have heard warnings about not using sheets, but this was no issue whatsoever. I really like the way the back looks. The 2 bands of printed squares run across the top and bottom of the quilt.
And here's one last closeup of my freehanded filler. It's fun, and whimsical and I like to use this on busier prints. I think it quilts up nicely, allowing use of more formal feathers and rows of swirling to also coordinate in the quilting scheme.
Hope you have a good weekend. Stay warm. Stay indoors. And may you not have to use a shovel!